Reviewed by Jade James
Amped Software is used by law enforcement, military, and government agencies worldwide. Founded in Italy, the company are committed to setting the standard for image and video forensics and helping to fight crime to keep communities safe. The main focus of the organisation is to develop the most advanced and complete yet easy to use technologies for all image and video processing relating to forensics.
Previously Amped Software has developed several tools, such as Authenticate for photo analysis and tamper detection; Amped FIVE for forensic image and video enhancement; and DVRConv for automatic video conversion. Replay is their latest tool. Launched at this year’s Forensic Europe Expo in London, it is aimed at frontline police officers and investigators, enabling them to quickly view, analyse and present evidence.Amped Replay boasts many benefits to investigators, forensic video labs and organisations. Users are able to convert, play and view videos with no need for legacy tools or proprietary player software. You can export processed videos to a standard format for presentation; correct aspect ratio and interlaced videos; and crop, rotate and resize images. With Replay you are able to perform basic enhancements to better see faces, license plates and other objects, annotate images with text and arrows, and add a company logo. As well as magnification of subjects or areas of interest, you can make quick and easy redactions to protect victims or hide other subjects and objects.
Currently Replay is supplied as a software solution only and is compatible with any standard PC which is running Windows 7/8/10 – 32/64 bit. The software also supports numerous languages (English, Italian, Spanish, Polish and Japanese).
To get started with Amped Replay, I was provided with a link which allowed me to download the software. The setup of the software was quick and simple: all that was necessary was to activate my trial when prompted and I was up and running in no time.
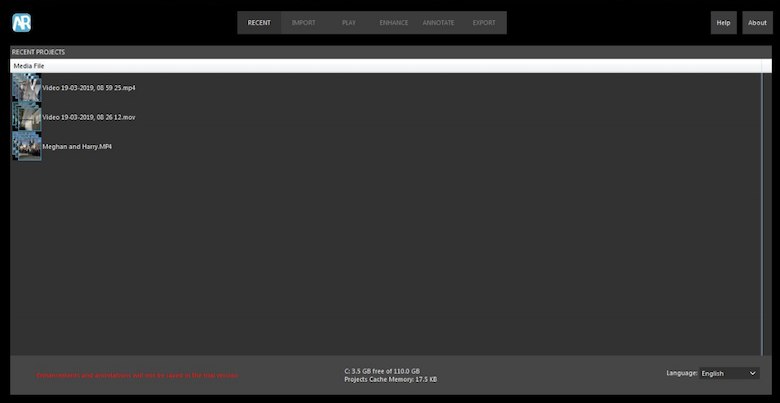
When Replay is loaded, you are presented with the ‘Recent’ tab, which shows the projects you have been working on recently (if applicable). It also shows you how much capacity you have to save your projects and allows you to select a language for the software. You can go back to the ‘Recent’ tab at any point and select other projects you are working on and you will be able to continue working from where you left off. Since I was using a trial version, my previous bookmarks and annotations were not saved. If you are too heavy handed when switching between projects, Replay will crash.
The crashing issue has already been fixed, so should not present a problem. – Amped
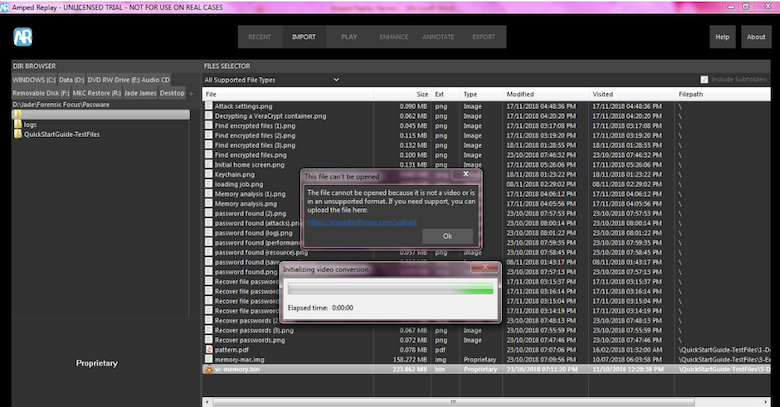
If this is the first time you have run Replay then you will need to switch to the ‘Import’ tab in order to import the video file you would like to process. Using the Directory Browser, you can navigate through the host device’s file system to find and select the video file of interest. A nice little feature on this tab is the functionality to bookmark specific folders for easy access; this means you do not have to search through a whole file system if you have video file in one particular folder. You can hover over files in the file selector screen, and if possible a preview will be shown.
Adding the file of interest is as simple as double clicking it. You will only be shown file types which are supported, however you can change this to show all files if required. If you try to import a file other than an image or video, Replay will give a prompt which tells you the file is unsupported and also provides you with the option to upload the file to their server, in which case the file will then be inspected and added to the system.
The ‘Play’ tab displays your images and videos. This tab provides you with a wealth of information about the selected file, such as the file name, file path, file status (original or converted, depending on how the software has decoded the file), file size, format of the file, codec of the file (for example H.264 or MPEG-2 or 4), width and height of the file in pixels, the frames per second in the video file, and whether or not an audio stream exists. You are also presented with the option to choose whether or not you want to decode any audio in the file. According to the supporting documentation of Replay, disabling the audio from the ‘Play’ tab can sometimes fix any playback issues that might occur. Finally, you are also given the number of frames, and the running time of the video.
Underneath the file metadata, you are provided with the opportunity to enter case information. The details provided here will be shown in the report if you choose to export it later on.
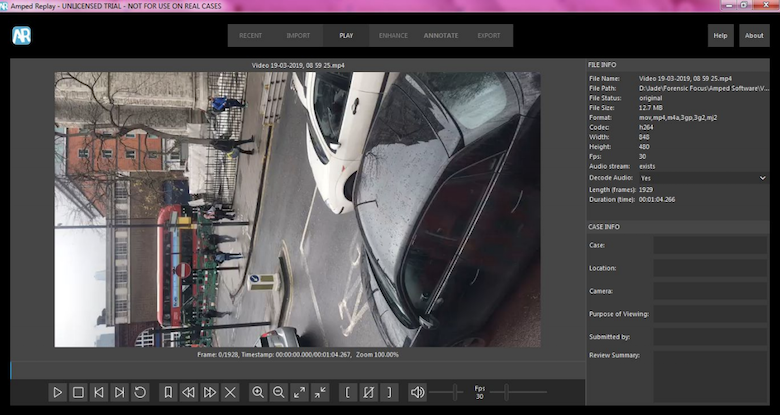
Within the ‘Play’ tab, you have a variety of functionality to play with. Under the video file you have the following player options, most of which are pretty explanatory:
● play (keyboard shortcut – K)
● stop
● previous frame (keyboard shortcut – J)
● next frame (keyboard shortcut – L)
● loop (repetitive playback of the video)
● the option to create bookmarks (keyboard shortcut – M) for the exportation and/or inclusion in a report and the ability to navigate between bookmarks.
There are also options to zoom in or out and to change the size of the video file. As well as bookmarking, you can select a range within the video clip if you only want to view a certain part of it. Finally you have the option to adjust the volume and the frames per second (note: adjusting the fps means you lose audio for the video). All shortcut keys are available within the supporting documentation of Replay.
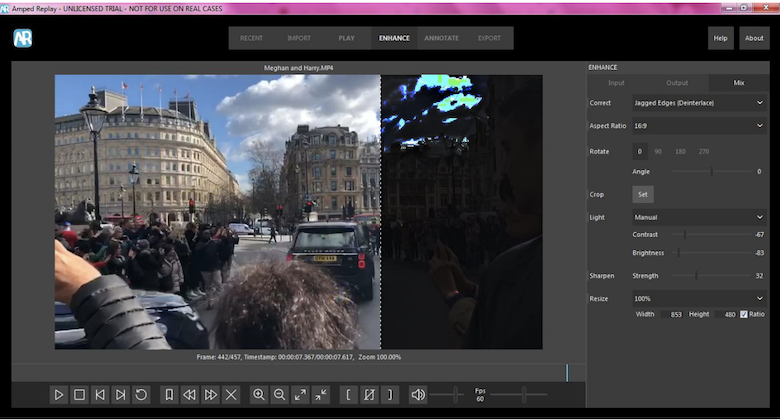
In the ‘Enhance’ tab, you are presented with the same player functions as the ‘Play’ tab, but here you are able to do basic processing and start to really get creative with the video file. The correct option allows you to solve specific issues regarding jagged edges in an interlaced video (an interlaced video is a technique used for doubling the perceived rate of video display without consuming extra bandwidth) and stretched videos (this corrects a video that appears to be stretched by using line doubling).
Aspect Ratio allows you to toggle between 4:3 and 16:9 to ensure the video is displayed correctly. Rotate allows you to manually rotate the video file to the correct angle, or you can select one of the predefined options (0, 90, 180, 270). Lastly you can crop the video file for the selection of a specific area, adjust the light manually or automatically, sharpen an image or video, and resize. A very useful feature of this tab is the ability to show the image or video in a mixed view, so you can see how each enhancement affects the image after application.
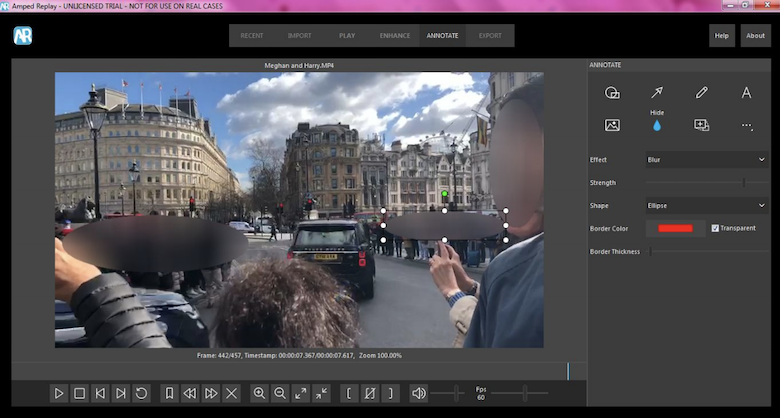
The ‘Annotate’ tab allows you to add your own interpretation to the image or video you are processing in several forms. You can draw shapes which can be used to obscure a person’s face or an object, or you can use shapes to highlight a certain area or object. Another option is to draw arrows and lines; you can choose the size and colour of these. The pencil lets you draw freehand for instances where you need to highlight something without using a rectangle or ellipse.
‘Add Text’ is self-explanatory: you are able to add text anywhere on the image, choose the font, size and alignment of the text. You are also able to add an image or company logo, for instances where you may be producing images or video for the media and would like to have your company’s insignia included.
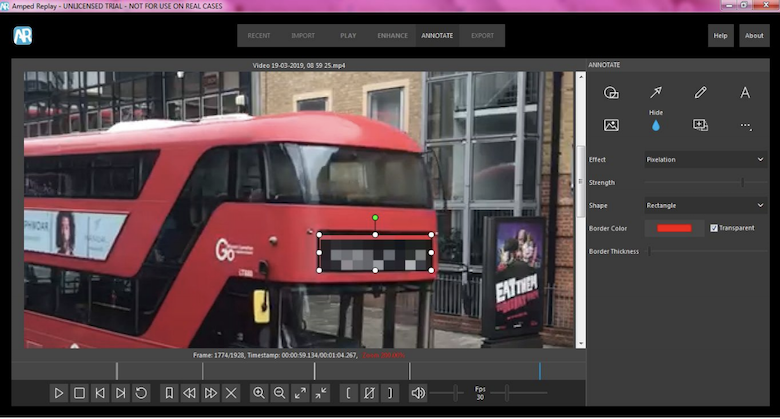
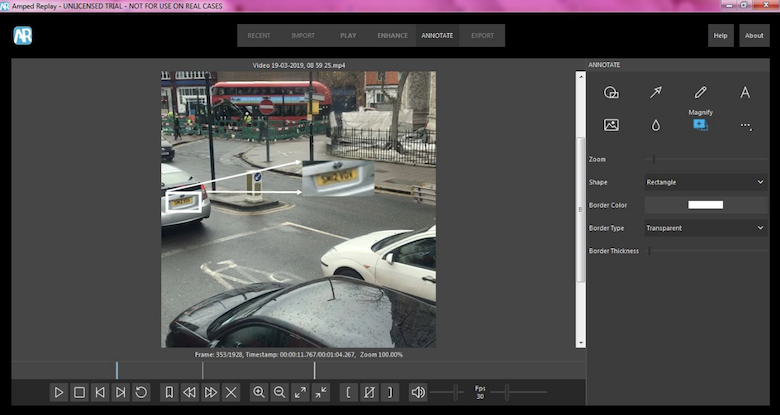
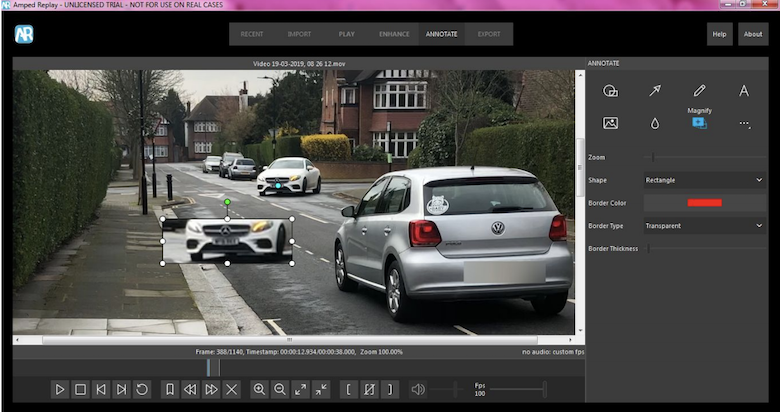
You are also given the option to redact an area by blurring or pixelating it, again using a rectangle or ellipse; you are also able to choose the border thickness and colour, and the strength of the effect. The magnification option allows you to drag the selection tool over the area you wish to see magnified. This option works really well as you can draw a shape anywhere on the image and use the blue dot to select the actual magnification point, which shows the result in a different area on the image.
You can also adjust the zoom of the magnification so that, for example, you can focus more clearly on a license plate.
With all the annotation enhancements, there are sub-options to copy, paste, delete, bring to the front, bring forward, send backward, and send to the back. You can set the selected annotation to show in the current frame only; set to show from the current frame to another frame; or set the selected annotation for all frames. You can also navigate to the first frame or go to the last frame in which the annotation appears.
‘Export’ is the last tab and this allows you to export the current image as a JPEG, PNG or BMP. You can export a video as AVI or MP4, which means you can convert the original file into a more universal format regardless of its origin. If a frame range was selected then only the sub-clip will be exported. Exporting the processed video as an MP4 will include all the enhancements and annotations you have created.
Handily as well you can choose to only export the bookmarks you have created; this is useful when you need still images quickly. Finally you can generate a report which will include all the case information you have entered, as well as processing information and any bookmarks you have tagged, with the first and last frames of a video. You can also select the checkbox so that Replay will automatically generate a report after every export and/or open the report file after every export.
Amped Replay is a very simple and useful tool for practitioners, investigators and frontline officers. It can produce very effective material in a short period of time. I was able to create material which could be used in a real-life scenario; for example, if a person had been arrested and you only had 24 hours to charge a person with the offence, it would then be crucial to produce enough substantial evidence within this time frame. Amped Replay supports the ‘Golden Hour’ principle by speeding up the processing, viewing and presentation of video evidence.
In later versions I think it would be beneficial to hear the audio when you change the frames per second, as you are not able to at the moment, but this is not usually essential. Also the magnification of certain objects or areas is a great enhancement, but even with the adjustment of zoom, you are not always able to make out the finer details. Lastly, although Amped give assurances in supporting documentation that Replay is forensically sound, there is not a way to actually verify this yourself through the software.
Amped’s reply regarding the reviewer’s suggestions:
Our decision to not include a slowed down version of the audio track goes back to the fact that this would need an audio filter, and we prefer to play the "original" audio rather than a slowed down version to avoid confusion for the user. Everything in Replay has been designed, as much possible, to be error proof.
Replay is not a fully fledged enhancement tool, it has been developed as a tool for quick and basic enhancements to conduct a first level analysis of the video evidence. If the user needs advanced enhancement features, they should be using Amped FIVE.
Amped Replay indicates in the report the hash codes of the file and all the settings of the processing. Under the surface, it uses a subset of the algorithms used in Amped FIVE. Given the target audience, we decided not to overly complicate the report with scientific details, but the same can be easily reproduced and documented in Amped FIVE should the case require a full forensic analysis.
About The Author
Jade James BSc (Hons) is currently a Digital Forensic Investigator at the Serious Fraud Office. She has previous professional Digital Forensic experience from working at IntaForensics, Home Office Centre for Applied Science and Technology and the City of London Police. Jade has gained experience from conducting Computer, Mobile devices examinations, Drone Forensics and has been involved with ISO 17025 & Quality Standards both as a Digital Forensic Practitioner and Quality Manager.